Part 2: Prepare training data
The second step in performing land cover analysis using CCDC is collecting training data. There are a few requirements for the training data for it to work with the rest of the process. This tutorial demonstrates how to ensure your data meets these requirements.
Training data requirements:
The data must be an Earth Engine FeatureCollection of point geometries.
An attribute in each point must contain a numeric value indicating the associated land cover.
An attribute in each point must contain a year that corresponds to the land cover label.
Optional additional steps
The predictor data as attributes for each point and for the year that corresponds to the land cover label.
Unique sample IDs as attributes
Importing your training data as an Earth Engine Asset
I am not going to go into details, as that has been documented in depth on Google’s Developer Page. However, it’s worth making sure your data is the correct format. You can do that by printing out the first feature. Note the params object contains parameters for classification and was defined at the beginning of this tutorial.
var trainingData = ee.FeatureCollection(params.Classification.trainingPath)
print(trainingData.first())
In the console, you should see information on the first training point. Select the feature and then select ‘geometry’. Make sure the the ‘type’ is ‘Point’, like in the figure below. If it is anything else (such as Rectangle or Polygon) then your must convert your data to points before continuing.
Creating a numeric land cover attribute
The land cover label must be numeric, so it cannot be a string (such as “forest”) or a numeric string (or a number that is written in string format). To check the type of your attribute select the ‘JSON’ button on the right side of the console to expand the json representation of the feature. The button is circled in red below:
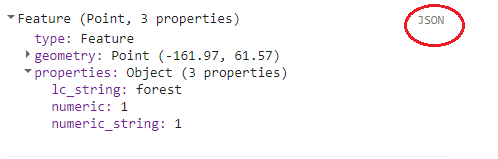
img1
You should see the JSON of the feature appear:
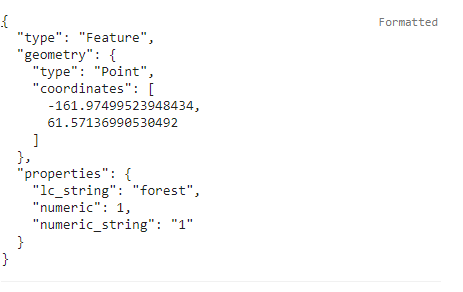
img2
Note that my feature has three attributes: lc_string, numeric, and numeric_string. The lc_string attribute will not work because the classifiers require numeric class property. In the first picture, where the output is formatted, the numeric and numeric_string both look like they’d work. But when viewing the JSON representation, it can be seen that the numeric_string still has quotations, and thus is still formatted as a string. Therefore, only the numeric attribute would work for this tutorial.
If you do not have a numeric attribute indicating land cover you can convert a string attribute to numeric using the ‘remap’ Earth Engine (EE) function. The code to do so is rather straightforward, but we have a helper function in our API. For this example, I’ll demonstrate how it’s done using the EE function and our CCDC API, and hereforth I’ll mostly be relying on the API.
Using the example defined in the parameters for this tutorial, there are 7 classes: Bare, Developed, Forest, Herbaceous, Shrub, Snow/Ice, and Water in the attribute ‘LC_Class’. Here we will redefine this attribute to be numeric 1-7.
print(trainingData.aggregate_histogram('LC_Class'))
trainingData  = trainingData.remap(['Bare','Developed','Forest','Herbaceous','Shrub','Snow/Ice','Water'],[1,2,3,4,5,6,7],'LC_Class')
print(trainingData.aggregate_histogram('LC_Class'))
This can also be done using the ‘remapLC’ function in our API. See the API documentation for a full description of available functions.
trainingData = utils.Classification.remapLC(
    trainingData, 'LC_Class', 'LC_Class',['Bare','Developed','Forest','Herbaceous','Shrub','Snow/Ice','Water'],[1,2,3,4,5,6,7],[1,2,3])
print(trainingData.aggregate_histogram('LC_Class'))
Note that the attribute ‘LC_Class’ is now numeric.
Add a year attribute
In order to determine the CCDC coefficients to use as predictors for training the classifier, each point needs to have a year attribute to query the CCDC results by. For example, if you know a training point corresponds to forest in 2014, then the CCDC coefficients for 2014 will be used for training. If all of your training data corresponds a certain year, you can add the attribute with a simple bit of code. In this example the training data corresponds to 2014 and it is assigned to an attribute named ‘year’.
trainingData  = trainingData.map(function(feat) {
  return feat.set('year',2014)})
Get predictor data for each training point
We need to extract predictor data for each training point before we can apply a classifier. We can do this either manually right before submitting the classification, or we can extract the predictors in advance and store them as properties of each of the training points. For this tutorial we will use the second way, because it enables a faster classification that will load “on the fly”. This is useful for testing classification parameters. The function to do this is called ‘getTrainingCoefsAtDate’. First, however, we need to construct the CCDC coefficient image to sample from.
Note: The change detection results from the previous section must be specified as the ‘changeResults’ parameter!
// Define bands to use in classification
var bands = params.Classification.bandNames

// Define coefficients to use in classification
var coefs = params.Classification.coefs

// Segment ids
var segs = params.Classification.segs

// Property corresponding to year of training data
var yearProperty = params.Classification.yearProperty

// Define path to change detection results
params.Classification.changeResults = '/path/to/change/detection/results'

// Load ccd image stack with coefficients and change information
var ccdImage = utils.CCDC.buildCcdImage(params.Classification.changeResults, params.Classification.segs.length, params.Classification.bandNames)

print('CCD Image:', ccdImage)

// Finally, get ancillary topographic and climate data
var ancillary = utils.Inputs.getAncillary()
Now that we have the CCDC image we can calculate the predictor data for each point, filter features that return no data, and export the results as an asset.
var trainingData = utils.Classification.getTrainingCoefsAtDate(
  trainingData, coefs, bands, yearProperty, ancillary, ccdImage, segs)


// Filter points with no data
var testBand = params.Classification.bandNames[0] + '_' + params.Classification.coefs[0]
trainingData = trainingData.filter(ee.Filter.notNull([testBand]))

print('First training point with predictors:', trainingData.first())

Export.table.toAsset({
  collection: trainingData,
  description: 'trainingDataProcessed',
  assetId: params.Classification.trainingPathPredictors})
You should now see in the feature attributes all of the predictor data that can be used for classification.
Add unique IDs as attributes
Another optional, but recommended, step is assigning each sample with a unique ID as an attribute. EE gives each point an ID, but they can be long and seemingly random. The ‘assignIDs’ function in our API will shuffle the sample and assign a unique ID to a given attribute name.
trainingData = utils.Classification.assignIds(trainingData, 'ID')