Part 3: Classify time series segments
The third step in performing land cover classification using CCDC is to use the training data from step 2 in a machine learning classifier to classify each CCDC segment. Note that each pixel can have a different number of segments depending on the number of changes detected. That is why the coefficients for CCDC are stored in n-dimensional arrays, because each pixel can have a different number of dimensions depending on the changes detected. This means that the process is slightly more complicated than a simple supervised classification, but this tutorial will go through it all.
A code example using GLANCE data and parameters can be found here:
Classification requirements:
The training data must be specified in the format described in Part 2 of this tutorial.
A machine learning classifier.
Converting the CCDC coefficient data to an image that can be classified
The API functions ‘loadResults’ in the Classification module and ‘getAncillary’ in the Inputs module can be used to create the CCDC stack with ancillary data to classify.
// First load the API file
var utils = require('projects/GLANCE:ccdcUtilities/api')

// Define a couple parameters
var bandNames = ["BLUE","GREEN","RED","NIR","SWIR1","SWIR2","TEMP"]
var inputFeatures = ["INTP", "SLP","PHASE","AMPLITUDE","RMSE"]
var ancillaryFeatures = ["ELEVATION","ASPECT","DEM_SLOPE","RAINFALL","TEMPERATURE"]
var numberOfSegments = 6
var classProperty = 'landcover'
var trainProp = .2
var seed = Math.ceil(Math.random() * 1000)
var studyArea = ee.Geometry.Polygon(
        [[[-65.11727581440459, -8.755437491733284],
          [-65.11727581440459, -13.240578578777912],
          [-59.470303158154586, -13.240578578777912],
          [-59.470303158154586, -8.755437491733284]]], null, false);
var trainingDataPath = 'PATH/TO/YOUR/TRAINING/DATA'
var classifier = ee.Classifier.smileRandomForest({
  numberOfTrees: 150,
  variablesPerSplit: null,
  minLeafPopulation: 1,
  bagFraction: 0.5,
  maxNodes: null
})

// Obtain the CCDC change detection array
var ccdcArray = 'PATH/TO/YOUR/CCDC/ARRAY'

// Next, turn array image into image
var imageToClassify = utils.CCDC.buildCcdImage(ccdcArray, numberOfSegments, bandNames)

// Now get ancillary data
var demImage = ee.Image('USGS/SRTMGL1_003').rename('ELEVATION')
var slope = ee.Terrain.slope(demImage).rename('DEM_SLOPE')
var aspect = ee.Terrain.aspect(demImage).rename('ASPECT')
var bio = ee.Image('WORLDCLIM/V1/BIO')
    .select(['bio01','bio12'])
    .rename(['TEMPERATURE','RAINFALL'])
var ancillary = ee.Image.cat([demImage, slope, aspect, bio])
Next, we can actually do the classification! We’ve already defined the parameters above, so we can then use the ‘classifySegments’ function to classify the CCDC segments.
// Now do the actual classification add the first segments classification to the map

// Get training data as FC
var trainingData = ee.FeatureCollection(trainingDataPath)

// Optionally filter by study area
trainingData = trainingData.filterBounds(studyArea)

var results = utils.Classification.classifySegments(
    imageToClassify, numberOfSegments, bandNames, ancillary, ancillaryFeatures,
    trainingData, classifier, studyArea, classProperty, inputFeatures)
  .clip(studyArea)

// Get a legend and visualization parameters from the api.
var viz = utils.Results.viz
var legend = utils.Results.legend

Map.addLayer(results.select(0), viz, 'Seg1 Classification')
Map.add(legend)
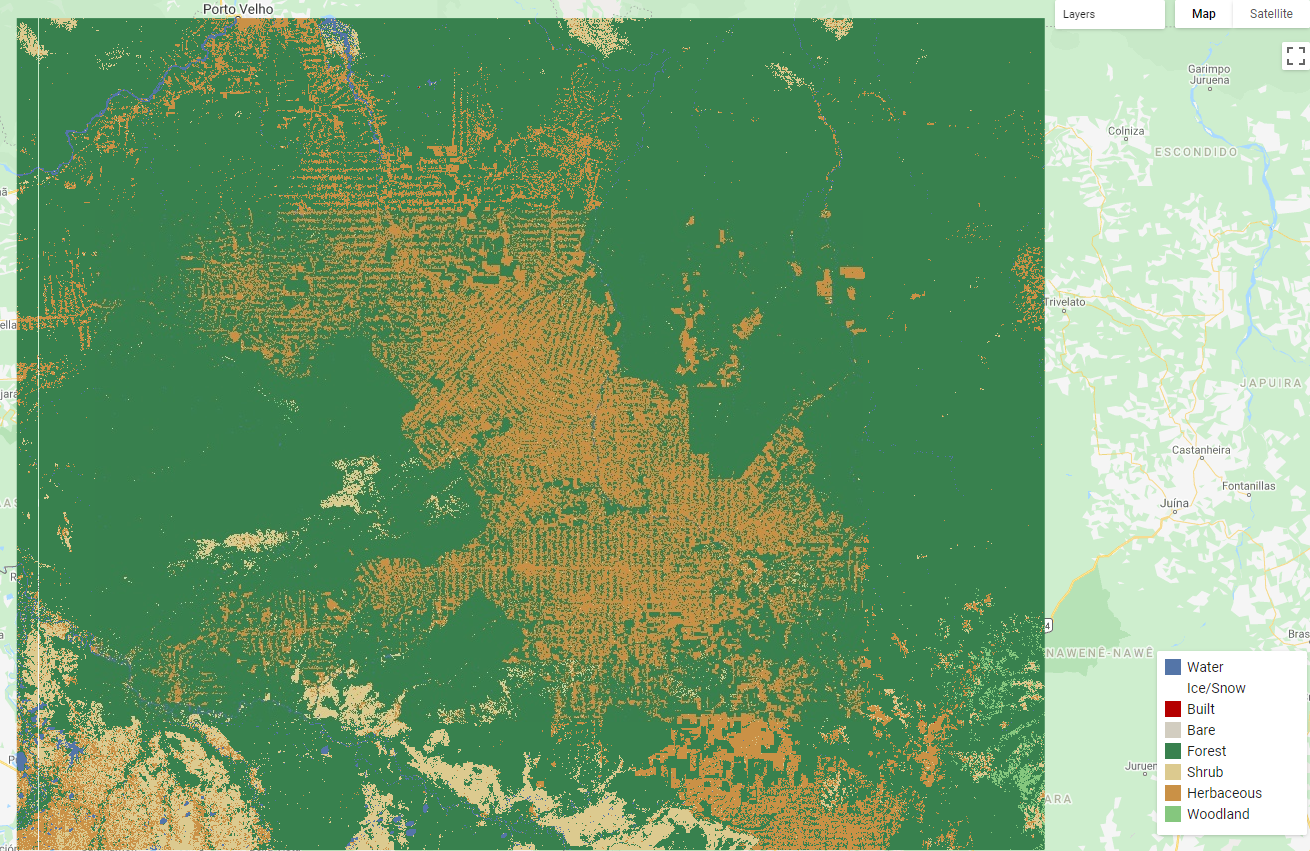
img1
And just like that, we can get a classified land cover map! The layer added represents the first segment land cover.